


Complete Guide on Installation of Solar Panels by a Roofing Company
Solar panels produce electricity from the sun and are a renewable energy source. These systems save homeowners money on their electric bills and help reduce the environment’s carbon footprint.
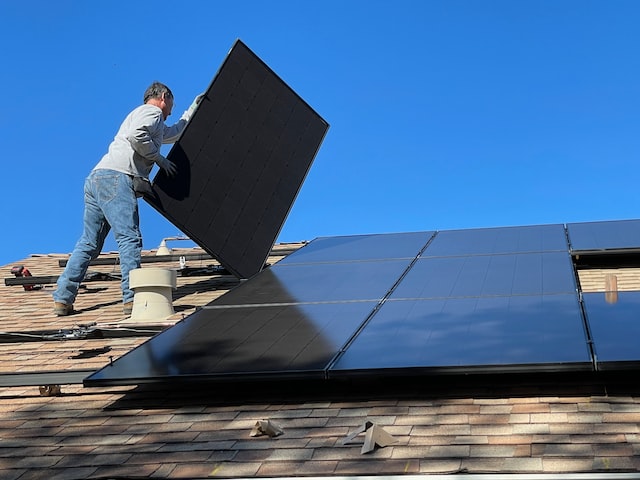
Solar panels can be installed on a roof or the ground, depending on the property’s location and weather conditions. However, a south-facing roof produces the most electricity from the sun.
Installation of the Solar Panels
Aside from providing homeowners with a more energy-efficient lifestyle, solar panels also offer numerous other benefits. These include reducing power bills, getting federal tax credits, and earning recognition for selling surplus energy back to the grid.
Installing a solar system is not as complex as many people believe. However, it’s essential to work with a professional who is experienced in the area and can handle any necessary electrical wiring.
Another benefit of the installation of solar panels with a roofing company is that they are generally equipped to provide roof maintenance and inspections. For example, they can clean debris after a storm or check for rodent infestations.
It makes it much easier for homeowners to keep their roofs looking tremendous and functioning efficiently. It also reduces the chances of damaging a new solar installation.
Lastly, pairing a roof replacement with a solar panel installation can save money on labor costs down the road. While it isn’t necessarily a requirement, it can be a good idea to do the two projects together.
Adding solar to your services is brilliant for any contractor looking to increase their business and protect their margins. It’s a way to differentiate from the competition, generate more business, and help homeowners transition away from fossil fuels. It’s also a chance to secure your company’s future and capitalize on rising customer demand for clean, renewable energy.
Installation of the Inverter
To run your solar panels, they need to be connected to an inverter. It allows them to convert the direct current (DC) power produced by the solar panels into alternating current (AC) power, which can then be used to run your household appliances.
Typically, a solar inverter is installed near or under the solar panels. It can help keep the system cool down and minimize the panels’ damage.
After the inverter is installed, it needs to be connected to a circuit breaker panel and a fuse box. The circuit breaker will allow it to break the electricity flow, and the fuse box will prevent any power surges.
Before connecting the wires from the inverter to the home circuit breaker, ensure the voltage is correct. If it isn’t, you can cause a lot of damage to your circuit breaker and other electrical equipment.
Once the wires are connected to the breaker, you’ll need to connect them to the different areas of your house. It will help ensure that all your electrical zones have solar energy from your inverter and battery.
It is also a good idea to get a solar battery to store your energy when you’re not using it. It will give back some of the power you’re not using and help reduce your electric bill.
Installation of the Racking System
The racking system attaches solar panels to the roof or ground and sets the orientation and tilt angle of the solar array. It also helps to maximize the energy produced by solar panels.
Racking systems comprise various components, including mounting rails, inverters, and wiring. Wiring runs through the racking system’s rails and connects to electrical junction boxes attached to the back of the solar panel.
These racking systems are designed to accommodate different types of rooftops and structures. They are typically anchored to the ground using steel beams driven into the soil or anchor systems such as helical piles or ground screws.
Choosing the right solar racking system can save your business time and money while increasing safety on the job site and keeping customers happy. Fortunately, many racking solutions are on the market to meet installation needs.
Some of the industry’s leading companies provide a comprehensive choice of racking options for your solar energy requirements. In addition, they have the expertise to tackle the most challenging racking projects, such as ballasted ground mounts that can be installed in areas with high wind and snow loads.
Installation of the Electrical Wiring
The electrical wiring of a solar panel system is a complicated and time-consuming process. Therefore, it’s best to hire a professional trained in how to work with electricity safely.
Several types of wires and cables are used in solar panels, and the decision to use one depends on the installation’s location, climate, and design layout. The simplest way to determine which type of wire is right for your project is to review your wiring diagram.
Choosing the suitable wire is essential for getting the most energy out of your solar panels. It is because different wire gauges carry different levels of voltage and current.
For example, a 6-gauge wire is rated at six amps, while a 10-gauge wire is rated at ten amps. The latter is more durable for solar panel wiring and ideal in locations with strong winds or continuous vibrations.
Another critical factor in determining the correct wire is considering the maximum amount of current that can travel through it. It is the maximum number of amps (A) a wire can carry, and it’s essential to be aware of this when planning your solar panel wiring.
After you’ve chosen the suitable wire for your solar panel wiring, it’s time to start putting together the entire system. The first step is connecting each solar panel’s wires to a common terminal or busbar.